Creating Approval-Based Automated Workflow using Azure Logic App

In this article, the process of purchase order approval is automated using Azure Logic app service. The intention of this article is to understand the Logic app service with a use case.
Prerequisite
An Active Azure Subscription
Azure Storage Account
Use case Flow Diagram
 Fig.1. Use case Diagram
Logic App: Logic App is one of the Azure resources used to create an automated work flows which integrates application, services, data and systems.
Workflow: Workflow consists of a sequence of steps which defines a task or process. Each workflow starts with a single trigger which is then followed by actions and/or conditions.
Trigger: The first step in Logic App is the trigger. It specifies a condition, based on which the subsequent actions will run in the sequence.
Action: Once workflow is triggered, subsequent action steps-in the workflow. Action performs the configured operations during the execution of the workflow.
In this article, a Purchase Order (PO) approval process is automated using Azure Logic App workflow. Below mentioned is the sequence of operation in this use case,
User requests for approval of Purchase Order (PO) from section admin by uploading the request file to a storage space.
Based on the time interval configured at Logic app trigger, Azure Logic app polls storage account, to check if any new blob has been uploaded to the configured container.
If the trigger condition met i.e., when a new PO is uploaded, Logic app begins to execute the workflow.
As described in Fig.1. Use case Flow Diagram, workflow starts with trigger followed by actions. Actions such as,
Retrieve content of the uploaded blob.
Parse the blob content (The PO request content is in JSON format) to JSON object. Once parsed, the content of the file can be used in the downstream actions using Logic app’s dynamic content feature.
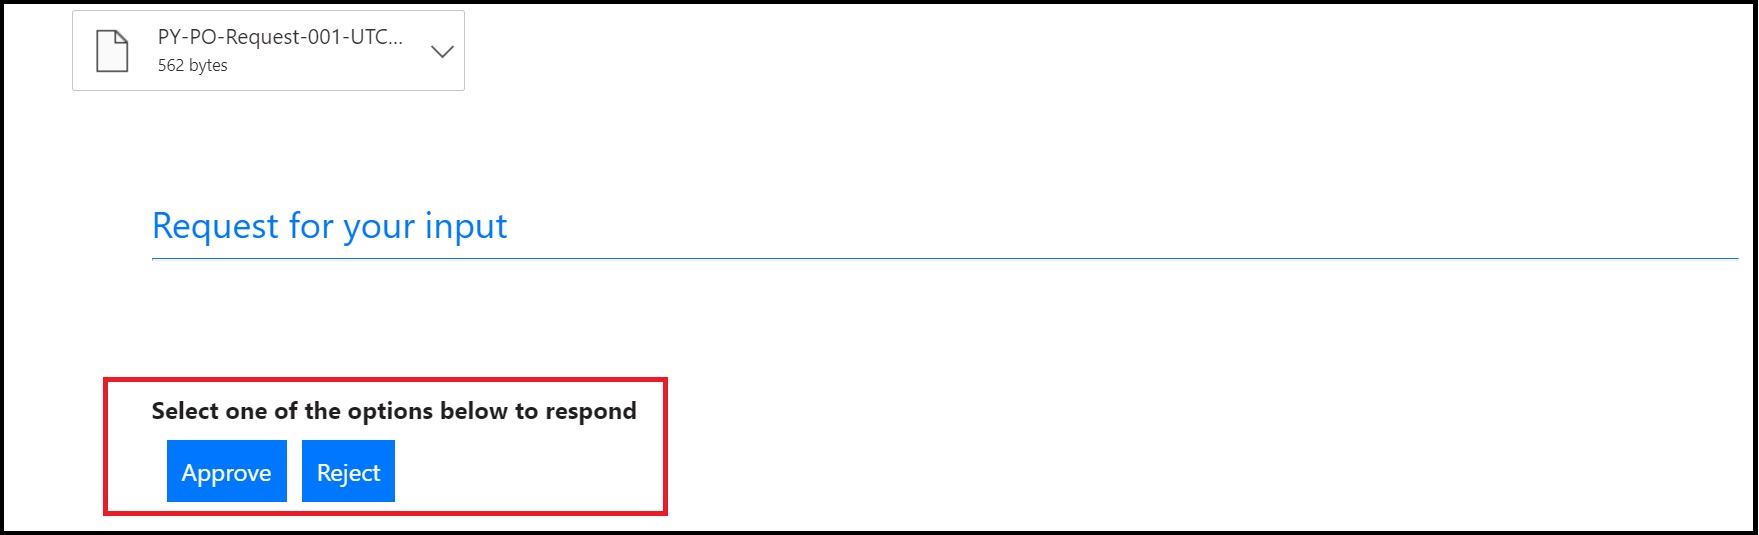
Send an email to section admin for approval. The admin can either approve or reject the request from the same email.
Based on the admin’s approval, the process will branch out into two ways i.e., request approved (Success) or rejected (Failed).
If approved, status changed to approved in PO, blob moved to a different container for downstream processing and an intimation mail is sent to requestor that their request has been approved and PO is moved for further processing.
If rejected, an intimation email will be sent to the requestor, blob will be deleted from source container and the process ends at this stage.
Creating Azure Logic App in Portal
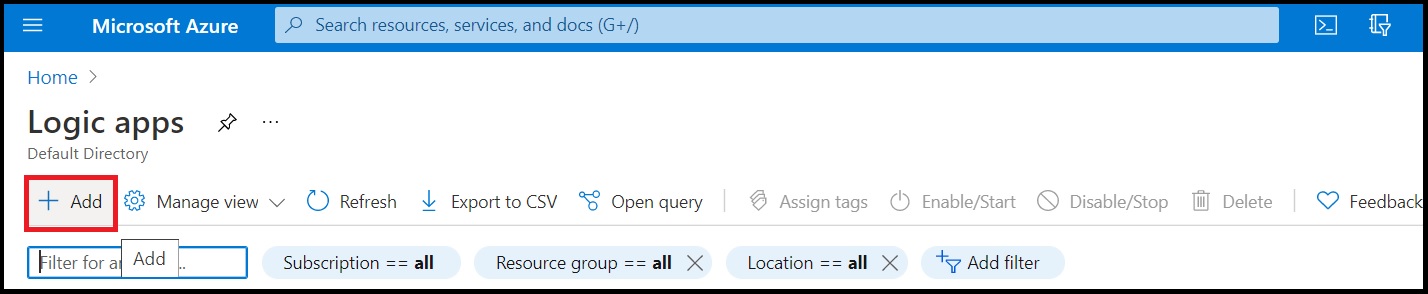
Step1: Navigate to Logic App resource by searching for Logic App from search window and click on Add button to create a Logic app instance.
Step2: In the Create Logic App window, provide the necessary basic details such as
Resource Group: Select existing (or) create new resource group.
Instance Type: Consumption (or) Standard.
Logic App Name.
Region: Region in which the user wants to spin up the Logic app instance.
Enable Log Analytics: To monitor and collects logs from Azure Logic app services and derives insights from the generated logs.
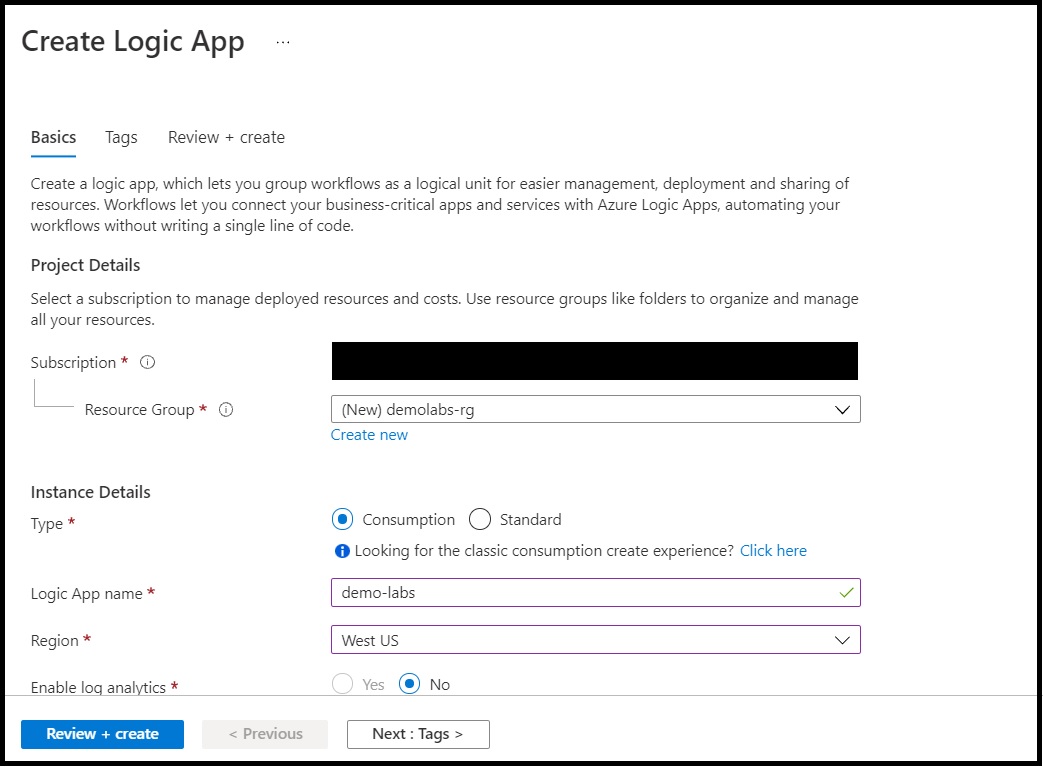
Click on Review + Create button to begin the deployment of Logic app instance.
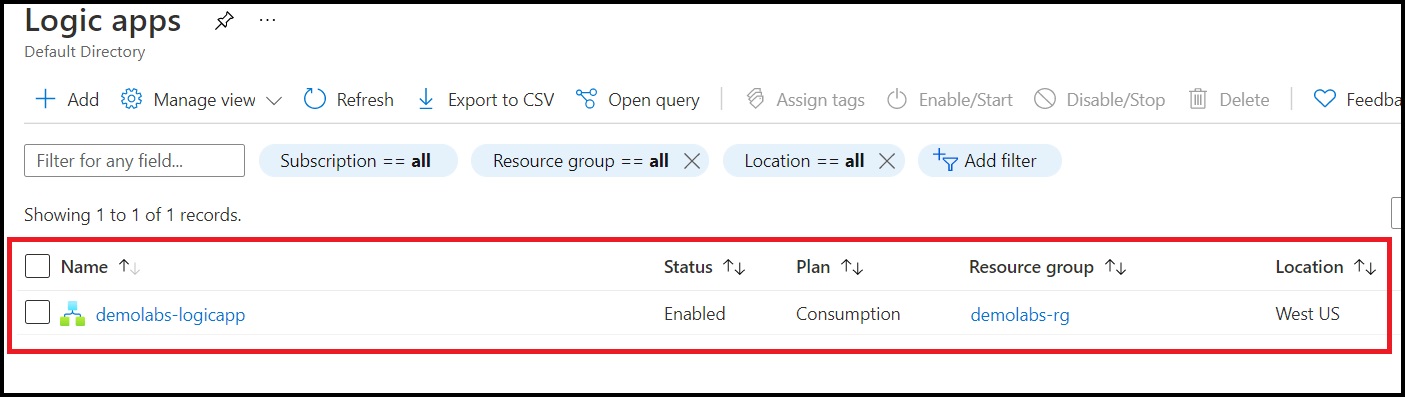
Step5: Once instance is created, navigate to Logic app service and inspect the new service created with provided details.
Logic App Workflow Creation
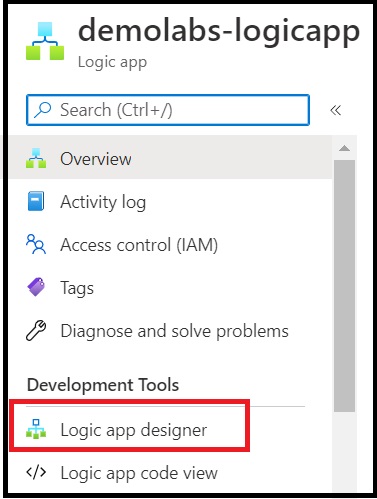
Navigate to the newly created Logic app service, click on Logic app designer section to start configuring the workflow.
The workflow should begin with Trigger followed by Actions and/or Conditions. The steps to configure trigger, actions and condition in workflow is described below.
Configure Trigger using Storage Account:
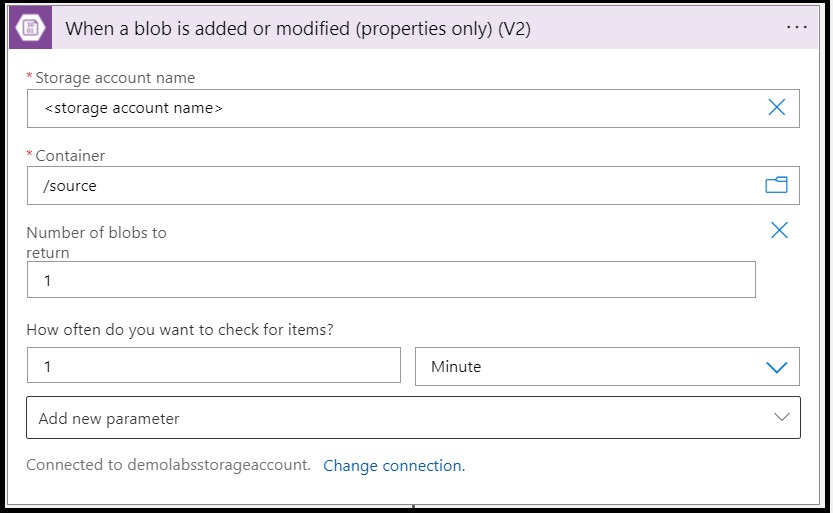
In Logic app designer section, add a built-in trigger Azure Blob Storage. In Azure Blob Storage trigger, provide details such as
Storage account name: Azure Storage Account. Create and configuring a connection to storage account.
Container: Source container name. Container to which new request blob will be uploaded by user.
How often do you want to check for items?: Polling time interval to check for any new blob is uploaded to source container.
Create Approvals (Request and Response):
This sections details on steps to populate and compose approval Email in the Logic app workflow. After the trigger, follows the actions downstream process.
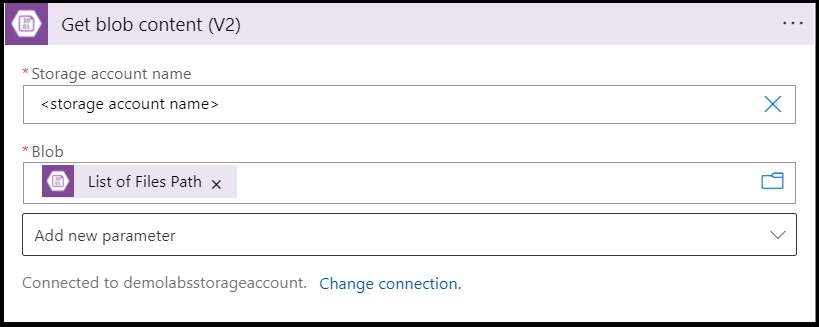
Step1: Built-in action, Get blob content is used to retrieve the contents of the blob uploaded.
Storage account name: Name of the storage account to which blob is uploaded. Create and configuring a connection to storage account.
Blob: Path of the uploaded blob file is provided to get the content. Logic app helps users to add relevant data by providing auto-fill feature using dynamic content or using expressions from the upstream trigger (or) actions. Here the List of Files Path is an output from upstream trigger.
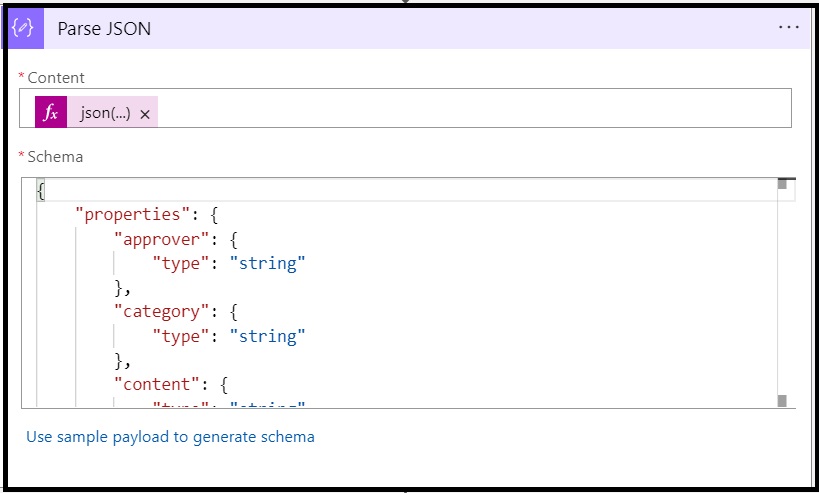
Step2: Built-in action, Data Operations is used with Parse JSON to parse the contents of the blob fetched from the upstream action Get blob content.
Content: Below expression is used to parse the JSON content of the blob
json(body('Get_blob_content_(V2)'))Schema: JSON schema of the uploaded PO file.
{
  "properties": {
      "approver": {
          "type": "string"
      },
      "category": {
          "type": "string"
      },
      "content": {
          "type": "string"
      },
      "requestedBy": {
          "type": "string"
      },
      "status": {
          "type": "string"
      }
  },
  "type": "object"
}
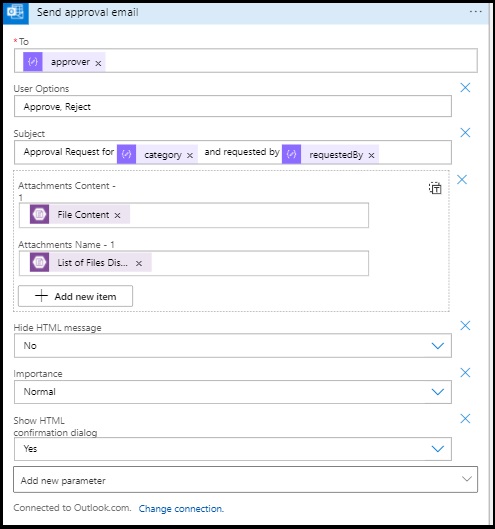
Step3: Once the contents of the blobs parsed, the data can be used to compose the approval email. Adding built-in outlook action, Send approval mail. The below data is provided from the output of the Parse JSON and Get Blob Content upstream actions.
To: To whom the approval email has to be sent. Approver mail ID
User Options: Approve, Reject
Subject: Email subject line.
Attachment: Contents and file name.
Importance: Normal (or) High (or) Low.
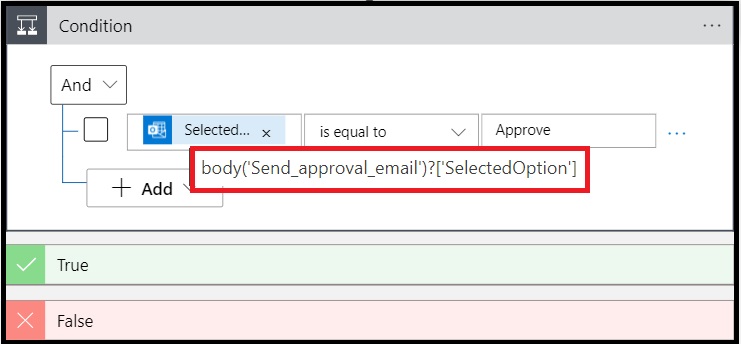
Action Based on Approval Response:
Based on the response from the approval email, the condition is used to branch out into two i.e., True (Approved) and False (Rejected).
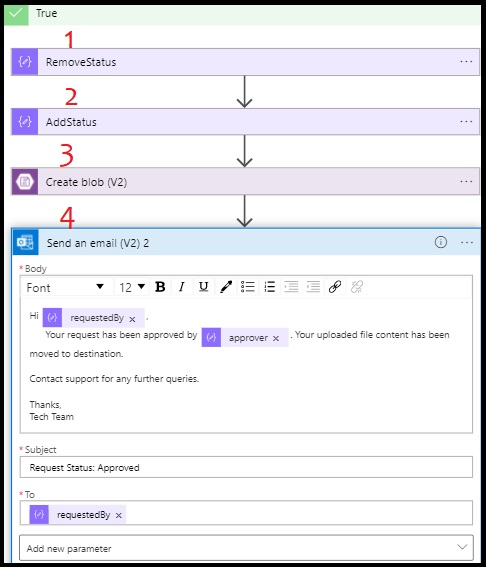
If Approved:
Remove Status: From the JSON removing the status.
Add Status: Once status is removed, add a new property as
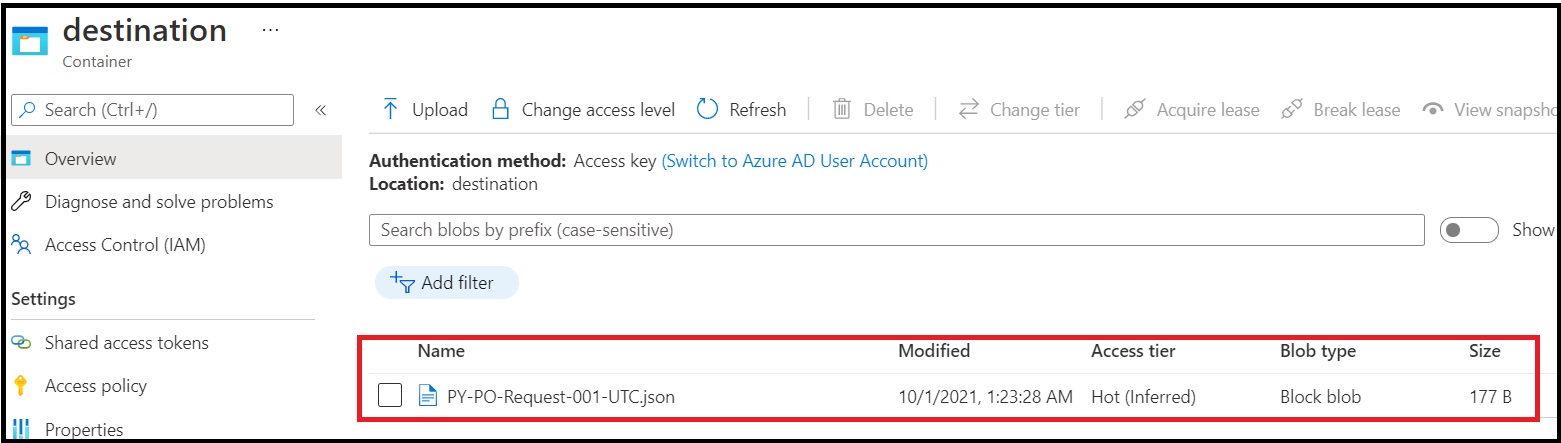
“status”:”approved”.Create blob: The approved PO moved from source container to destination container for further processing using Create blob action.
Send an email: This built-in action is used to send an intimation mail to the requestor once status is updated and uploaded to destination container.
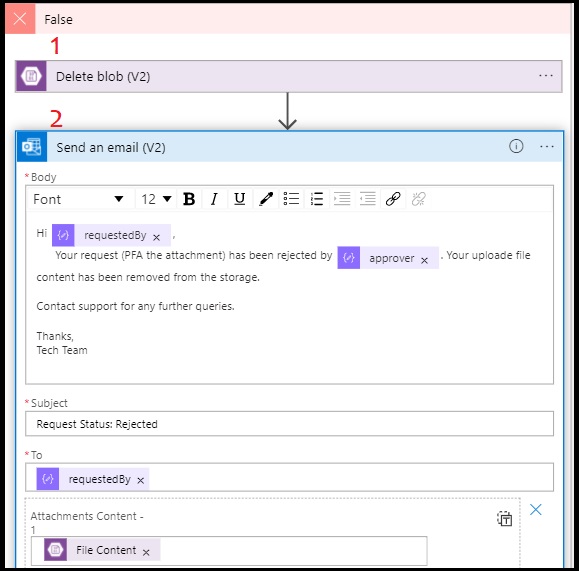
If Rejected:
Delete blob: Delete the blob uploaded by requestor.
Send an email: This built-in action is used to send an intimation mail to the requestor after approval is rejected.
Run Azure Logic App:
After Logic app workflow is configured, the workflow can be tested by uploading a PO request file to source container and receive an approval email to approver mail ID. Once approved/rejected, blob can either be deleted (if rejected) or moved to destination container (if approved).
Approved:
- Request File Upload.
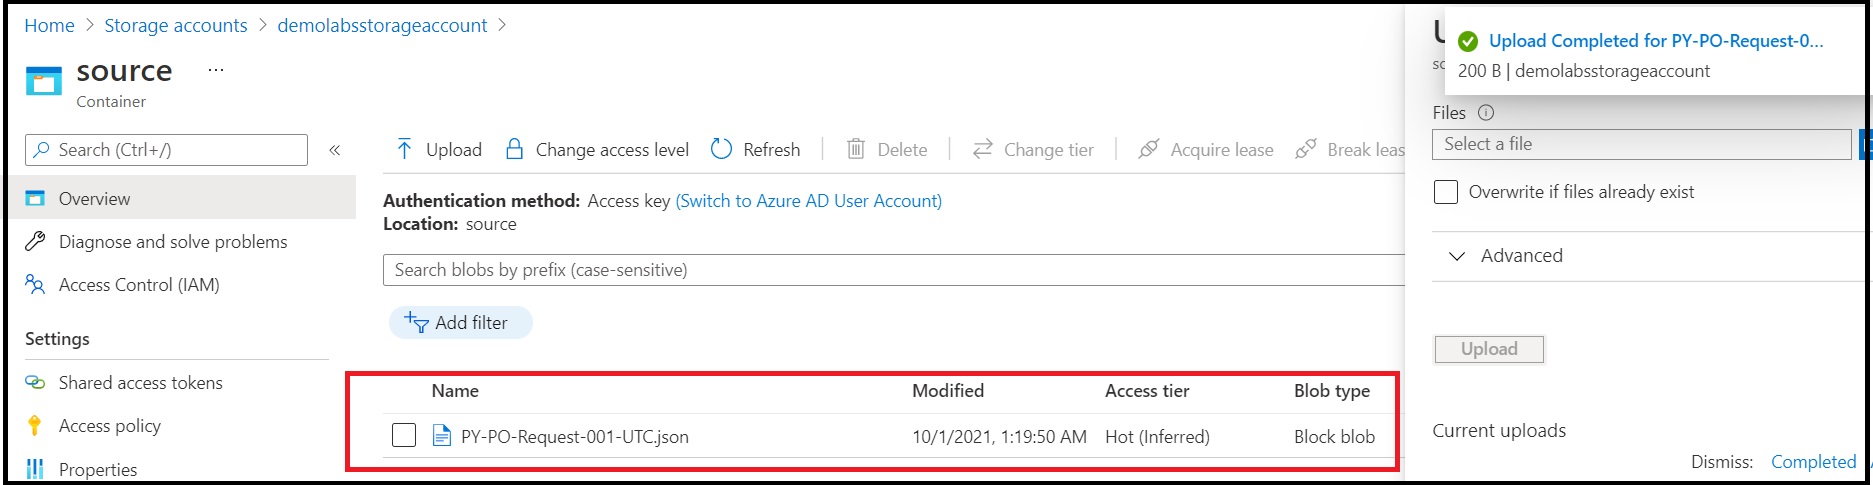
- Approval email received by approver.
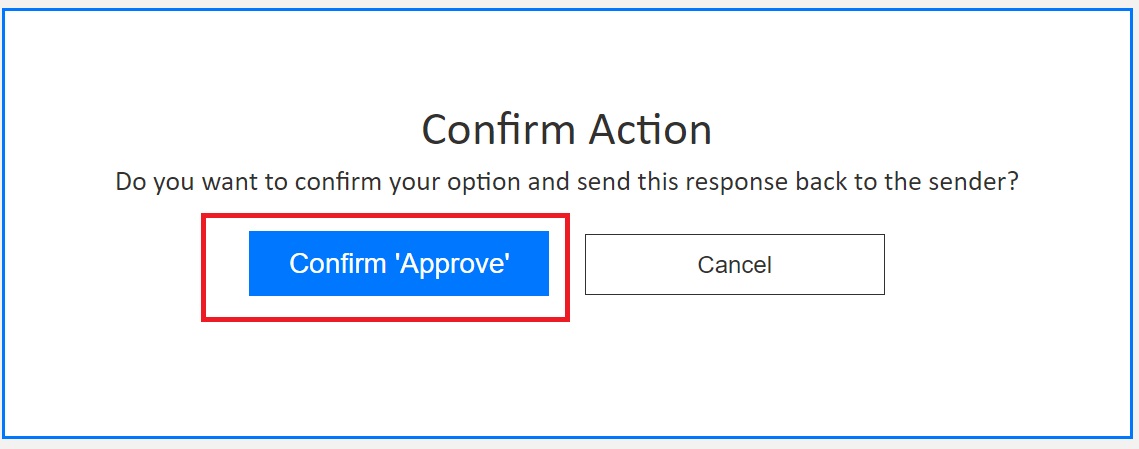
- Once Approved, requestor received an intimation email that request has been approved.

- Blob moved from source container to destination container.
Rejected:
- Approver mail, rejected by approver.
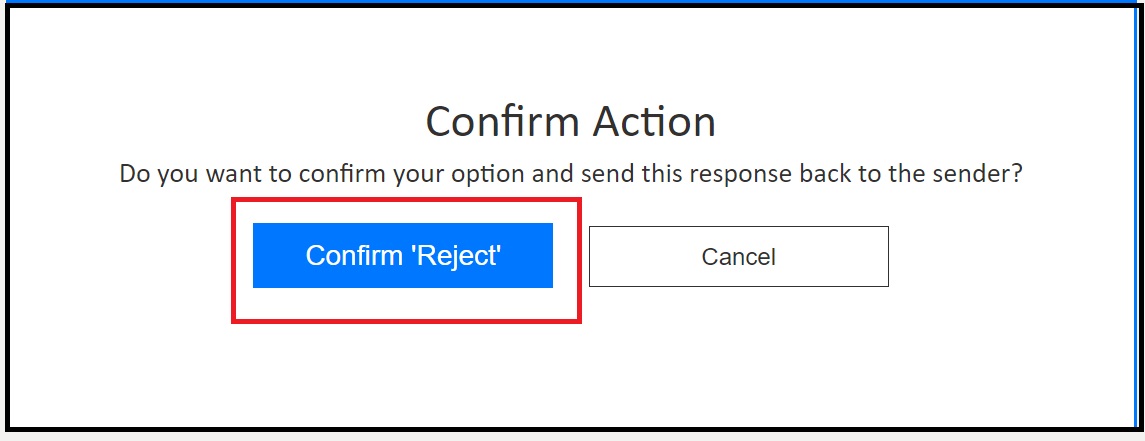
- Requestor received mail intimating that requesting PO is rejected by approver.

Thus, an automated approval workflow created by leveraging Azure Logic app service. Logic app can be extended further to include for further processing and/or automation.


